Post Date
June,
19
2019
Stay Tuned to my Social Media or Subscribe to My You Tube Channel (Search The Jeep Momma) then hit the little bell to get notifications.
Jeep Momma's LUX Lighting Systems Give-A-Way
LED Fender Lights Coming SOON!!!
Jeep Momma's LUX Lighting Systems Give-A-Way
LED Fender Lights Coming SOON!!!
15% Off Discount Code: JEEPMOMMA

Just this past weekend, I finally installed the LUX Lighting Systems Monster Rock Lights. The company asked me to do a review and install of their lights. They said, they are super easy to install.
YouTube Video How To
WOW!!! It was very easy, even with the problem I had with my firewall hole. I need to quit letting my self-doubt get in the way.
I was given the Monster LED Lights.
LUX Website -- "The Monster from LUX is the ultimate LED rock light and is the brightest LED rock light on the PLANET! The Monster is perfect for the hard core off road enthusiast who does not compromise."
While I have nothing to compare these lights to, my first reaction when I turned them on at night was "Wow, these are bright". Super easy to place with their magnetic LED's. I can even move them if I feel they might get in the way of a rock.
LUX Website -- The All New Smartphone RGB Pro-Installer from LUX! We settled the debate with this one! Thanks our friends at XK Glow we were able to integrate their controller and App into our Pro-Installer creating the best RGB Smartphone controller on the market!
Control 2 separate RGB zones with your smartphone and add a third zone for single color lights! Incredibly durable design with super easy screw clamp connections allowing you to run all your RGB products from one controller - not just LUX lights!
This is the system I got, however I have not purchased the app yet to test the smartphone controller. I am plenty happy with the old fashioned way of turning on and off a button. You know how I like my buttons! Eventually, I will be brave enough to move to the 21st Century of Technology.
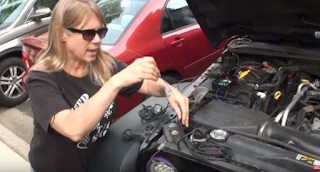 First Step - Snake your LEDs for the Jeep from the engine to underneath your Jeep. You will want to know how much wire you need before placement of the lights.
Second Step - Place your LED's in your desired location underneath your Jeep. They are magnetic so you can always adjust them somewhat. Use the black zip ties to attach the wires out of the way.
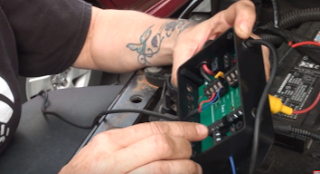
Third Step - Attach the colored wires to the designated points in the controller box. I placed my controller box on top of the fuse box. I used heavy duty Velcro to attach the box. The kit includes self-tapping screws but I didn't want to put holes into my fuse box top.

Fourth Step - Snake the wire for the on off switch across the Jeep to the driver's side firewall.
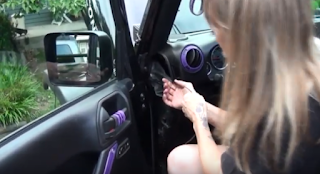
Fifth Step - Detach the plastic panel inside the Jeep to gain access to the firewall hole. Then using a snake to pull the wire through the hole.
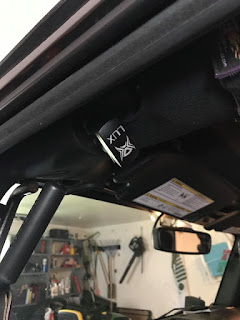
Sixth Step - Attach the switch to the wire. Since each Jeep is set up differently you decide where you place your switch or attach it to an AUX switch you may already have in your Jeep/vehicle. For now mine is up by the roll bar.
I am looking at possibly cutting a hole in my A-Pillar plastic panel for the switch. Or finding a replacement panel.
TIPS
- Place the wires out of the way of moving parts and heat.
- Test out the lights before completely attaching wires and pulling through the fire wall.
- Do Not Attach to the battery until all wires are securely attached to switch and controller box.
- Watch my install video.



Leave a comment